


")


Configuration
Antamedia Medical software is easy for use, powerfull and reliable business solution. But as any other powerfull tool, require to be properly configured and set to get maximum from it.
Beside basic information of your medical practice that are requested from you to be set after startup of the application, you will need to take couple more minutes to configure other required settings in the software. After that you will be ready to make first appointment scheduling over the Antamedia Medical software.
On the Setup – Additional settings you should configure associates types which you have in the medical parctice and service category which you provide. From the Statistics create Associate accounts. Select weather associate is Conultant or Company and enter the personal details for the doctors, consultants and employees. Next step will be to define medical services and their prices on the Statistics – Services page. Select Category and add service, required time for it and price.
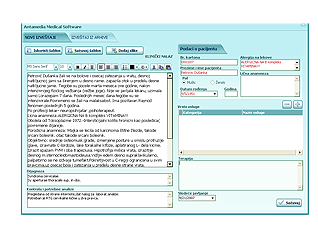
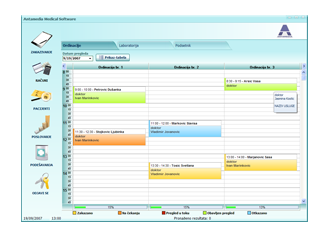
Now you are ready to schedule your first appointment. Go to the Appointments panel and in the scheduler view select cabinet and time period when examination should be provided. Press on New button. In this window you will set whether appointment is scheduled for new or old patient. With selecting New patient, new medical record will be created for a patient. Here is required to select the associate which will provide medical examination.
In the Appointment section, scheduled view provide different color for each appointment depending of the status. For example, `scheduled` appointment is in yellow, `waiting` is in orange, `ongoing` is in red and `finished` is in green color.
After finished examination, bill for provided medical services requires to be charged. New bills can be charged from the Bills – New Bills tab.